Showing posts with label Polymer Clay. Show all posts

Saturday, June 11, 2022

Lately, It's All Littles

Little kids...


Little adventures in our little neighborhood...


Little [Tiny?] bubbles...lol!


Little knits, little people...same thing?


Little cupcakes...


Wait. What? Can I eat those?
Well, no. They are made of polymer clay.


Bummer...but they're so cute! Look! I added beads and hangers!


Remember when I did polymer clay all the time? Like birds and sheep and seasonal things? So fun!

These photos are from a September
blog post in 2011.


But I haven't even looked at the stuff in the last decade, and I moved it all into the new house last April, so it felt like it was time to see if it was still fun! I only had primary colors, plus black and white (not pictured)...

Can I get cupcake colors with that? 
Apparently yes! (Look at that! Even chocolate!)


And even though there are no perfect cupcakes here, that's what generally happens when I bake treats to eat, so it tracks. These were so fun!


I suppose that I will get back to regulation-size knitting and crafting eventually...someday... But for now, I am having BIG fun, on a tiny, tiny scale! 

I hope your weekend is good, and that you are finding ways to have Big Fun at your house, too!
Thanks for stopping by, and Knit (and play) in Good Health!


Saturday, September 3, 2011

Home Sweet Home

If you've been reading the blog regularly, you know that Army Boy has left for a major deployment, Wifey-Poo and Peanut have moved back to our "home" state, and Dollface was recently married to Snake. (If you have not been a regular reader until today, now you are pretty much caught up! Yay!)

All of these recent changes to Pretty's family, and to the status of "home" for many of the family's members, have led me to some comfort knitting. Here's where I am on the Drift cardigan, past all the decreases and straight waist knitting, ready to increase for the bust:I know, I am really not that much further along than I was last week at this time, am I? Well, there just hasn't been time for much knitting with all those changes! Even at knit night this week, I did not knit as much as usual. Again, if you've been a fan of Pretty for long, you know that there are major shop updates planned in Etsy world! There have been many long nights with polymer clay and jewelry supplies, and I have gotten much accomplished. . .but not as much as I had hoped would be done by September third (we did not expect that deployment to happen until later this month, and I lost some serious time on a cross-country goodbye).

Still, to prove to myself that I AM making headway on the shop overhaul, today I dumped all of my new beads (now made into charms and stitch markers) out onto a table to marvel a bit at my creativity, and I thought you might also enjoy a peek at some of the items that will be gracing new row counters at Pretty Knitty Jewelry this fall. . .I know! You're just speechless at my total lack of humility, right? Maybe you're thinking I'm some kind of TURKEY?Well, I suppose that sometimes I am a turkey. But at least I am not angry. . .Angry isn't an emotion that I do very well. Oh, I do just about every emotion on most days, but I'm better at some than I am at others. Lately, I have mastered feeling nostalgic. . .reminiscing about when I was a little kid, and my biggest worry was a test that I didn't study enough for. . .remembering when my children were small, and my biggest worry was a test that they didn't study enough for. . .recalling the days when we were all together, at home together, on a regular basis. . .oh, the joys of home-sweet-home!Yet, even though we don't all live together now that my family has grown, we are still family, and the love continues to grow! Our granddaughter and our new son-in-law are proof positive that the love in this Pretty Knitty Family cannot be contained. . .and so it spills out in joy, whether we are together or apart. . .love and joy that must be shared.
Home Sweet Home is more than a place, it's a state of mind and heart. Wherever life takes you, you will always carry a piece of home with you, if you so choose, and I hope that you do. Keep your loved ones close at heart, and always remember that "
there's no place like home!"

Knit in Good Health!

Wednesday, August 24, 2011

NOT ANGRY. . .

You've met those people who are NOT ANGRY, haven't you? Oh, they have an axe to grind or a bad attitude to share, but just ask them. . .they will gladly tell you that they are NOT ANGRY!!! (I have added exclamation points for emphasis and embellishment, but please note that exclamation points are pretty standard when one states that one is NOT ANGRY.)

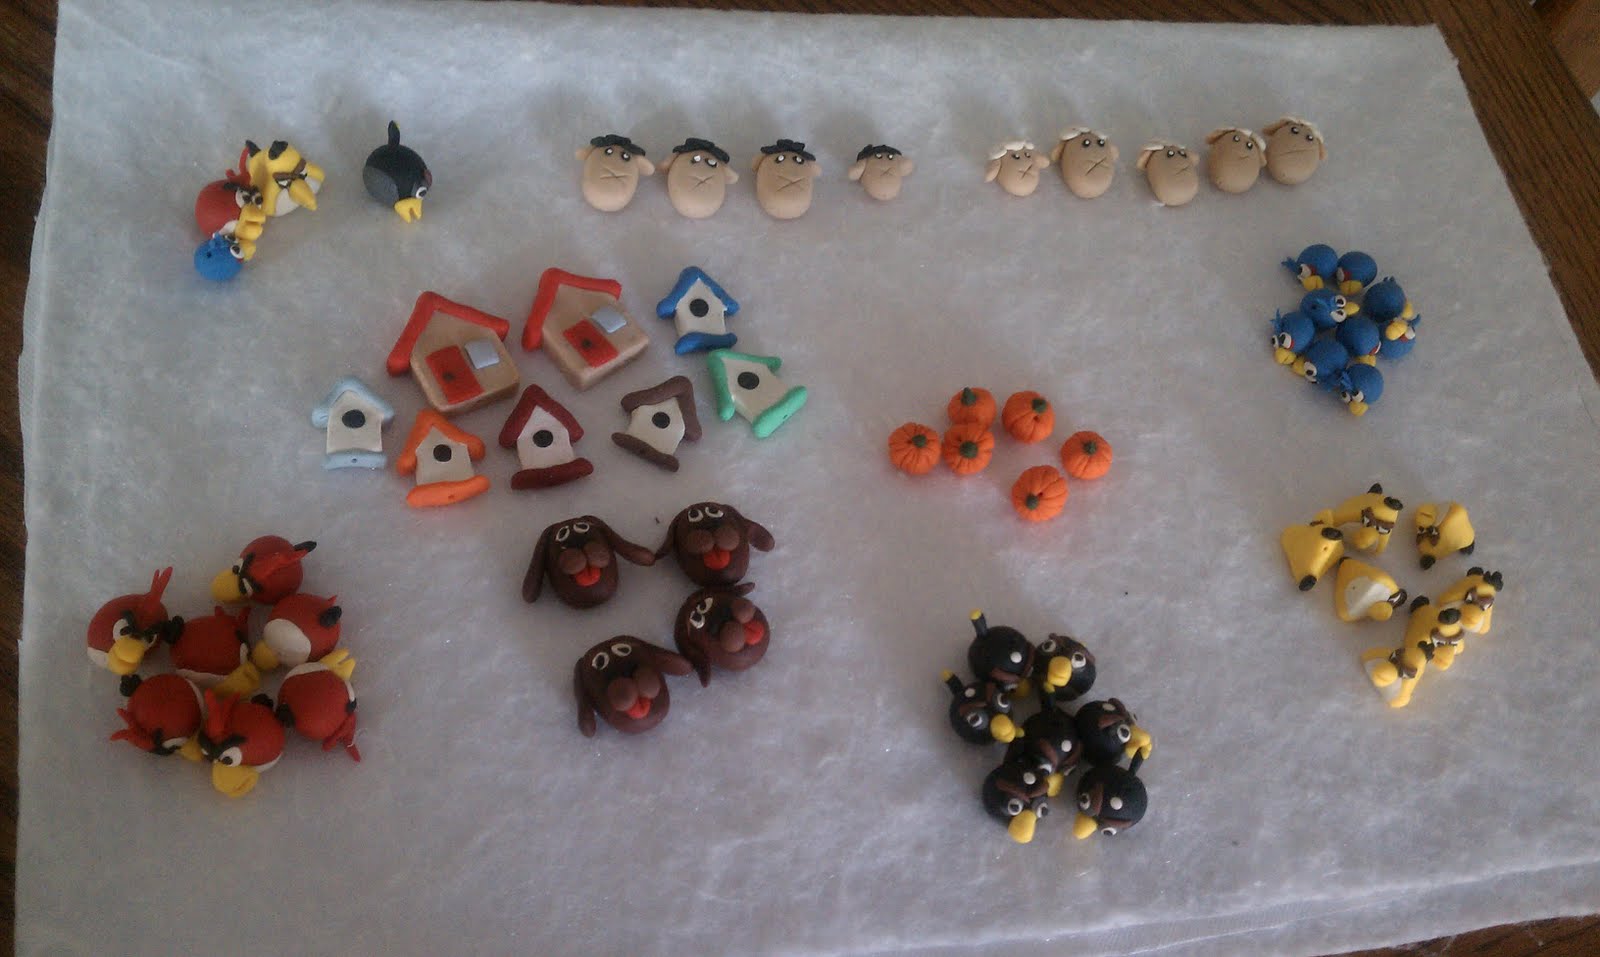
I will pause here to let you know that I have not had a bad week so far. As a matter of fact, I had quite a bit of fun over the weekend. . .I played with polymer clay for hours upon hours, and I came up with a bunch of fun stuff!
Besides playing with clay, I have also tried my hand recently at the wildly popular "Angry Birds" game on my smartphone. . .and let me tell you, it's just a tiny bit addictive!!! lol All this time with the birds has even inspired some new creations that will likely appear in the Pretty Knitty Jewelry shop soon!

But the more I looked at my birds, and the more I realized that they are close but not exactly like the birds in my favorite phone game, the more I got to thinking. . .these birds are NOTsomuch ANGRY. . .they are simply misunderstood. The red guy, he's NOT ANGRY. . .he is just incredibly frustrated at my lack of slingshot skills. The little blue one? He's NOT ANGRY either. . .he has a split personality disorder. . .that must be difficult! The blackbird is NOT ANGRY. . .he's a suicide bomber on a mission for his deity, and his religious conviction is startling. Last but not least, the yellow one. . .you know what? I think he IS angry! He may deny that fact in capital letters, and with exclamation points, but I think he (or she?) is angry. . .maybe because of the genderless depiction I have chosen for him (or her?).

At times like this, I am really thankful for the sheep!

There will always be more sheep in the shop, because the sheep just belong there. Sheep and yarn go together like rama-lama-lama-ke-dinga-de-dinga-dong! And, by the looks of things, we will also see some new friends at Pretty Knitty Jewelry. . .canine friends, home-sweet-home friends, and fall friends, too!!!


The new friends will likely keep their distance from the birds. . .no matter how NOT ANGRY the birds claim to be. Perhaps I will cage them, but then I might have to finally figure out why the caged bird sings. . .that might be too taxing for my Pretty Knitty brain these days. :)


I hope that you are not over-taxing your brain, or if you are, I hope that you are at least winding down with your favorite hobby. Thanks for stopping by, friends, and Knit in Good Health! (But please don't knit angry. . .it really messes up your gauge!)

Saturday, April 9, 2011

The Fool(?) on the Hill

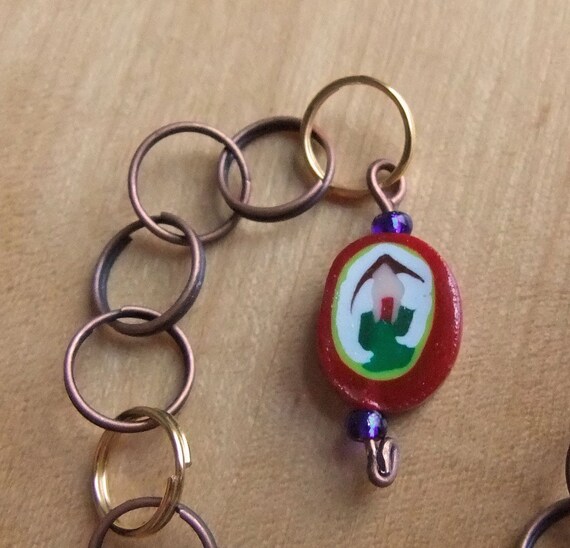
Remember, a while back, when I said that I had had a chance to play with clay again? And then I promised that those beads would find their way to the shop? Well, they have! Introducing the "House on a Hill" collection, by Pretty Knitty! Right now, there are two 20-row counters, one in copper. . .
. . .and one in silver! Oooohhh, SHINY!!!

I think I like working these millefiore-style beads about the best of any clay creating that I do. The process of figuring out which lump of clay to put where, so that the cut line of each bead will create the picture is demanding, but so fun! The first time I tried millefiore (here's a site that tells you more about it), I wanted each bead to be exactly the same as all the others. . .but my beads never seemed to reach that identical-ness that I was aiming for. Instead, I stressed out at the way each bead was an individual, and I felt like I was somewhat of a clay failure. Then I took a step back, and I ended up falling madly, passionately, foolishly in love with the imperfections. . .the character. . .of the beads emerging from the blade. I embraced it even. And look. . .

Look at my little houses on their hills. . .their tall, skinny hills, with their oddly shaped shrubbery, and imperfect corners. . .heck!, even though my "real" house (the one I live in everyday) is not set on a hill, it has imperfect shrubs, I can never seem to find a 90-degree angle when I want to put up a corner shelf, and none of the doors are perfectly squared into their frames. When we moved in, I called that "character," and I embraced it (mostly). Foolish or not, I love where I live, and now I love the House on a Hill collection at Pretty Knitty Jewelry. I hope that you like it, too!

Thanks for stopping in to see this "Fool" on her virtual hill,

and Knit in Good Health!

Saturday, March 5, 2011

House on a Hill

Sooo, the last time I played with clay, this is what I came up with. . .
Yes, I made another attempt at the millefiore, with a House on a Hill. It looks pretty much like I imagined it should, except that the hill became very tall and skinny during the reducing. . .but, it still looks like a hill. So, like a good little crafter, I cut and baked the pieces (along with some more sheep, you can never have too many sheep!), and I glazed everything while watching the Wednesday episode of American Idol that we had DVRed this week. . .
I LOVE that I can craft and watch TV with the hubby and sleepy kitties! And I am pretty pleased with how my finished pieces look this morning!
I think the sheep like them, too!
Look for these beads to appear on row counters (and maybe some stitch markers, too) in my Etsy Shop in the very near future! Ohhhh, I am so excited to put those together! I should stop blogging and get to it!

Thanks for stopping by, and Knit in Good Health!

Wednesday, September 1, 2010

Tu-torial, Tu-torial! How lovely are your pictures!

The clay so green, it looks like spring,
And red and yellow fun it brings,
Tu-torial of Polymer Clay -
Oh, show me how to make a cane!

Did you ever wonder how the picture gets into one of those little, flat beads? I know that I did, and so I did some research and learned also how to make picture beads myself!

So much to share today, and so many pictures, bear with me folks! Later on, there will be a little (read: few words, many pictures!) tutorial on how I made a Christmas Tree cane of polymer clay, which I then cut into beads for use on my Row Counters!

But first, as promised last time, Sock Pattern and Yarn Review #2:
In February, I pulled
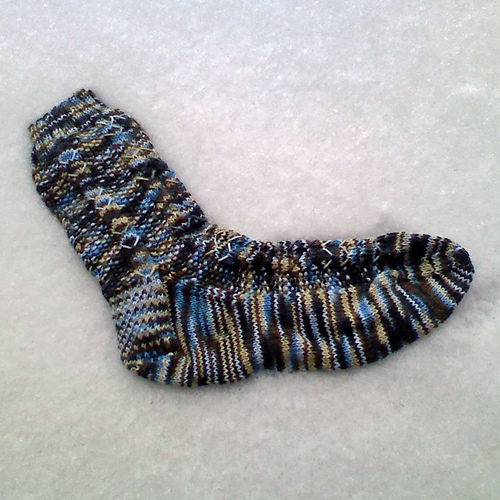
Edwardian Boating Socks out of my bin for my February Socks! The yarn is 5th Avenue Funky Sock Yarn, by Herrshners, and I had only one problem with this yarn, as it was not what I expected it to be. On the website, it stated that the yarn was wool/nylon, but when I read the label, it said Acrylic/nylon. . .that's a big difference. Some people really don't like to knit/wear socks in acrylic, and I confess that I am (at times) one of them. I guess you can't beat the big A for sturdiness and easy care (don't even think about bringing an iron into the room), but it does not breathe well, and is better suited to slippers and house-socks than inside-a-shoe socks. . .especially in warm weather! Still, the colors were good, and they played together nicely to make this pattern really sing:

By the way, I love the way this pattern knits and looks, but I learned (the hard way because I never tried it on as I went) that the linen stitch panels killed the elasticity of the thing, so that I couldn't even think about putting it over my foot without a re-do! I ended up knitting those panels in seed stitch, and ultimately the socks fit. . .but I gave them to College Girl anyway. . .I am a sucker for a teenager who loves hand-knit socks!

Overall, these socks are a good bet. :o) The pattern is well written and pretty, but remember to add stitches to your regular size in this pattern OR change the stitch on the plain panels to skip the inelastic linen stitch! I probably won't buy the yarn again for socks, though I might get some for other things.

And now, on with the Tu-torial!!! It's not all-inclusive, and there are many ways to build a Millefiori-style "cane" with clay, some high-tech, some not. The following is just my low-tech take. If you are going to dive into the process, you might also check out some
additional sites for more information, and refer to the use and baking instructions on whatever clay you are using. . .but this is how I turned this SculpeyIII clay:
. . .into these beads!:

Creating Christmas Tree Beads in Polymer Clay
Disclaimer: Do not use any of your polymer clay tools/ovens for food once they have been used with polymer clay! Residue from the clay can remain even after cleaning/washing, and baking clay (even a little bit) at temperatures over the manufacturer's suggested baking temp can create toxic fumes.

Step 1: Start with clean everything to avoid accidentally mixing colors. Wiping with baby wipes will take the clay off of most surfaces.

Condition the clay, I use a pasta machine, set on the thickest setting at first. . .
Then rolling it a little thinner and smoother as the clay gets softer. . .
Until I can roll paper-thin sheets on the lowest setting. The clay is soft, shiny and smooth when it is ready. . .
You can also condition the clay by simply working it in your hands, but I really love the results I get with the pasta roller. Bonus!, I don't need a rolling pin to create thin sheets!

Step 2: Once the clay is nice and soft, I divide it into small pieces which I then roll into 1/2" long tubes that I will use like Lite-Brite pegs to make a "picture" for the center of the cane:
Here are all of my colors rolled into pieces. . .some are thicker and some are thinner. I don't know how many I will need when I start, so I just roll out what I think I might need for now. I can make more if I need to, and I can use leftovers for something else!
Step 3: Stand the tubes up, and push them together to make a picture. . .in this case, a Christmas Tree for the holidays! My piece will be made up of several tubes of clay, and it will be about 1/2" thick everywhere because the clay tubes are all about the same length. There may be some tiny spaces, but these will be worked out when we "reduce" the cane's diameter.
Step 4: Now, we need a background, so I roll out some pieces of the white clay to fit into the outside edges, and to help me create a round-ish piece from my triangular tree!
Step 5: With some of my leftover clay, I make borders for the cane by putting the clay through the pasta machine again to make a 1/2"wide ribbon of clay for each border. For this cane, I want the green to be on the outside, so it's the last color I roll out to wrap around.
Right now, this piece is about 3" in diameter, and about 1/2" thick. Now it's time to make my round slab of clay into a thin tube of magical beads!
Step 6: The Magic Happens as I hold the slab in the curve of my hand, trying to maintain the flat edges, and I squish and squoosh and squash the clay, compressing it from the outside in. . .
. . .working from the center of the forming tube toward the picture ends. . .I am not "rolling" the tube, like I did earlier with my tiny clay pieces, but carefully compressing it, as evenly as I can. . .
. . .until the "picture" ends become distorted beyond recognition, and the tube is about 3/4-1" in diameter. Just keep squishing ("reducing") from all sides, gently and evenly. . .
. . .until it the ends look something like this. Where did the Christmas Tree go???
Step 7: Here comes the real magic. . .take a deep breath and swiftly cut the cane in the center with a very sharp blade to see the magic!
Amazing, no?
Step 8:
Now that the cane is so much thinner, you can squoosh a bit more, and cut off the bulky end. Then roll the tube out to be as thin as you like. Mine was about 1/4 - 1/2" in diameter. Then I let the thin tube rest for about 30 minutes before I used my sharp blade to cut the beads from the center of the cane.
Note: Anytime you roll the cane thinner, the ends will distort a bit, but you can cut these ugly pieces off and make colorful, spherical or oblong beads with them. Bonus!, these "leftovers" beads will match your cane beads perfectly!
Step 9: After the beads are cut (about 1/8" thick), you can make a hole lengthwise with a pin or thin piece of wire for creating a charm later. Or, if you want buttons, you can make holes through the flat sides of the bead.
Step 10: Then bake, according to the package instructions on the clay, approximately 15 minutes for every 1/4" of thickness in your pieces. Here are some of my beads, "skewered" and ready to be baked. On some of the canes, I added thin layers of red or yellow clay to the outer edge of the cane for a different look.
After baking and cooling, here are my beads! I will seal them with a shiny or matte glaze, and make knitting jewelry from them. . .just like I did with my spider friends!!!
Whew! That was a LOT of writing. Now, I think it's time to knit! I hope that you get some knitting and crafting time today. . .maybe you should try some polymer clay!
Or you could just Knit in Good Health!